Tuesday 25 December 2012

Brown paper packages

I intentionally left my gift wrapping to the last minute, because I try to find things to do on Christmas morning as I’m alone (my kids are with their father until dinner time).

Over the year, I save every little bit of ribbon that I get and throw it in to a box. I really like the look of brown kraft paper to wrap gifts in, so that is what I used.

DSC09710

I pulled out ribbon, baubles, ornaments and embroidery thread to embellish each of these gifts.  Frugal and environmentally friendly as most things are recycled.

DSC09711

DSC09713

DSC09716

DSC09715

DSC09722

This has been a pretty tough year. I definitely didn’t participate in the camaraderie of blogging as much as usual. After the passing of my sister on Jan. 1st, both of my parents became ill. Currently they are both in the hospital, unfortunately two different ones. It is an odd Christmas without my sister and even odder that my parents aren’t in their home.

Well, enough of the maudlin words, I have a turkey to get in to the oven, then I will pick up my kids and bring them home. I can’t wait! :)

Merry Christmas and here’s hoping to a wonderful new year.

Sunday 23 December 2012

A quilters sign

My sister in law makes the most fabulous quilts. I wanted to come up with a frugal gift that was meaningful and this is what I made.

I cut the letters out of black vinyl and the needle out of gold vinyl. I attached some twine with hot glue, right through the needle head.

I think she will love it.

quilters sign at www.junkinjunky.blogspot.com

UndertheTableandDreaming

Saturday 22 December 2012

My Christmas tablescape

Since I don’t have a lot of festive decorating going on, I decided to put some effort into my tablescape.

JunkinJunky

Indulge me while I show you the details.

I used paint chips to make some Christmas trees that I wrapped around the napkin/cutlery.

JunkinJunky

Guess who’s coming for dinner? lol. Not “the” Madonna, just my newfie mother-in-law. The place cards are also paint chips.

JunkinJunky

These pretty paper trees were made with a pattern found at http://ninuskan.blogspot.fi/2010/12/pitsinen-paperikuusi.html

JunkinJunky

Hanging from my chandelier is the kissing ball I made last Christmas

JunkinJunky

My goal was to keep it simple and natural with a hit of bling. Mission accomplished.

JunkinJunky

I opted out of putting up my big tree this year, instead using a table top tree.

JunkinJunky

And I used last years wreath on my coffee table, blinged out with some glittery snowflakes.

JunkinJunky

I even used paint chips as gift tags for some simple gift wrapping.

JunkinJunky

I am off of work until January 7th!  Woo Hoo!  I think it’s been over 7 years since I had this much time off in a row, in fact not since I went back to work after being a stay at home mum.

I wish you all a joyous holiday season. Merry Christmas.

UndertheTableandDreaming

Saturday 8 December 2012

Christmas Craft #6 – Scrabble tile gifts

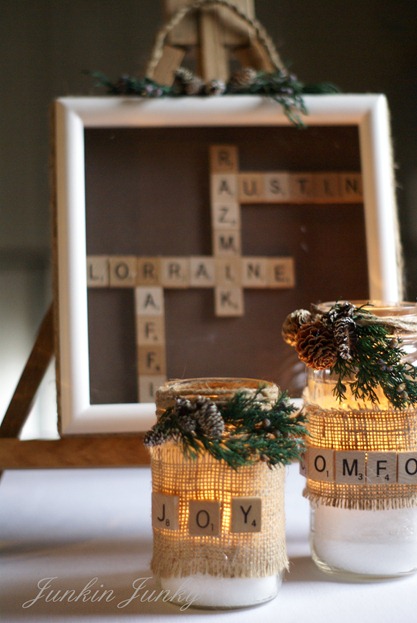
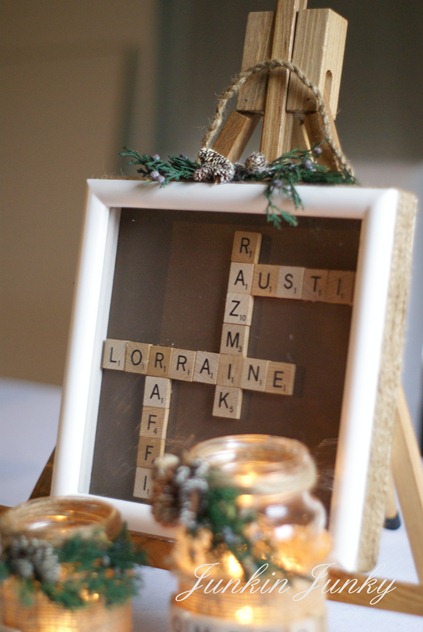
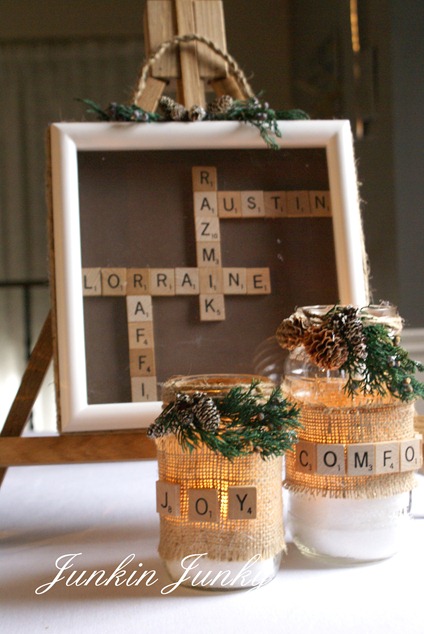
I have a lot of scrabble tiles that were given to me from people at work. I decided to use them to make a gift for my BF and her family.

Their names worked out perfectly!  And coincidentally their son (Austin) whose name fits in with their dad is so much like him, and their son (Raffi) is so much like his mum and his name fits in with hers!  What are the chances.

The mason jars were wrapped in burlap, I added some tiles to spell comfort and joy, some epsom salts and a tealight candle.  I added some greenery too.

scrabble tiles at www.junkinjunky.blogspot.com

scrabble tiles at www.junkinjunky.blogspot.com

scrabble tiles at www.junkinjunky.blogspot.com

Sharing with

Classy ClutterHoliday

Wednesday 28 November 2012

A new window = a new blind

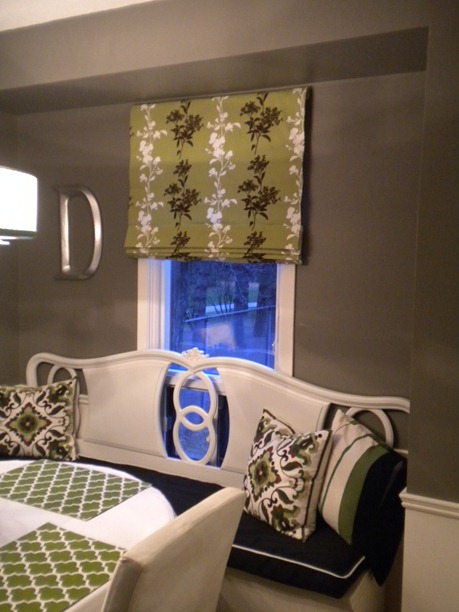
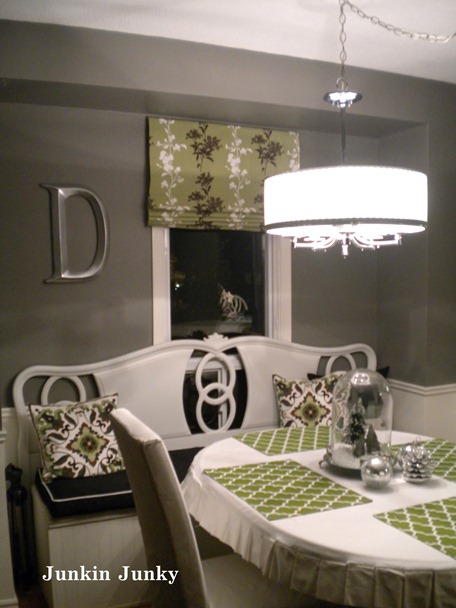
I had a couple of new windows and a sliding glass door put in last week, so I had to make a new window treatment, natch ;)

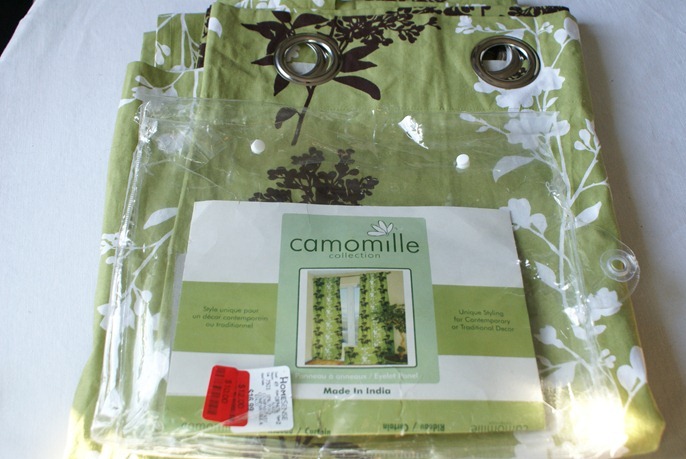
I used the same curtain that I bought last week to create the slip covers for my lamp shades (see the tutorial here).  One $10 curtain sure went a long way.

This is my first attempt at making a “real” roman blind, overall it turned out well.  I should have made it a little longer to cover the whole length of the window when let out, but it’s all the fabric that I had left. 

Roman blind at www.junkinjunky.blogspot.com

Roman blind at www.junkinjunky.blogspot.com

Rudimentary skills, just a little time consuming. I have made roman shades using mini blinds and they are just as good, and  a lot less work.

Monday 26 November 2012

Christmas Craft #5 – Memorial plaque

I made this for my parents. My sisters sudden passing on the 1st of this year still has us all reeling. I hope that this brings them some comfort.

www.junkinjunky.blogspot.com

Saturday 24 November 2012

Slipcovered lamp shades

I have been using this method to change my lampshades for a while now, and thought I’d share how I do it.  The beauty of creating a slip cover rather than gluing on the fabric, is that it’s so easy to change when you are ready.

Lampshade slip cover tutorial

I bought a curtain in the clearance section at Home Sense for $10

Lampshade slip cover tutorial

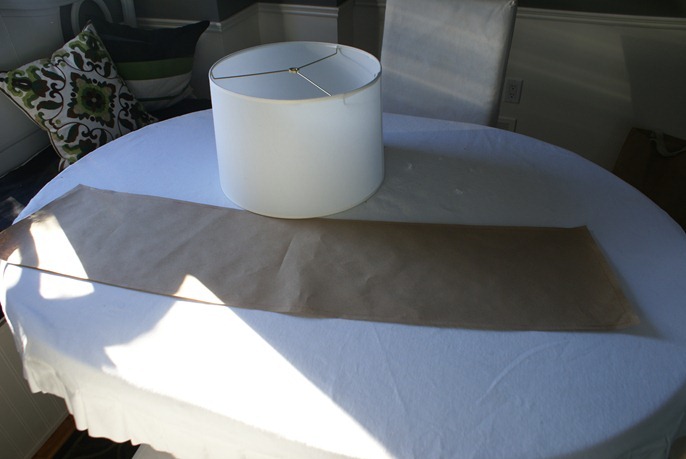
The shades are not drum shaped, they are slightly tapered at the top. I placed the shade on some kraft paper and traced it to create my pattern.

Lampshade slip cover tutorial

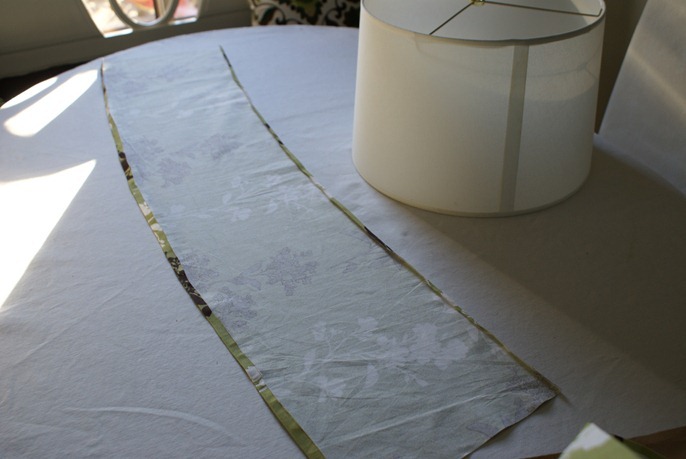
I cut it out 1/2” bigger all around to allow for seam allowance.  I then traced it on to my fabric and cut them out. 

Turn the top and bottom edges over 1/2” and iron, then sew.

Lampshade slip cover tutorial

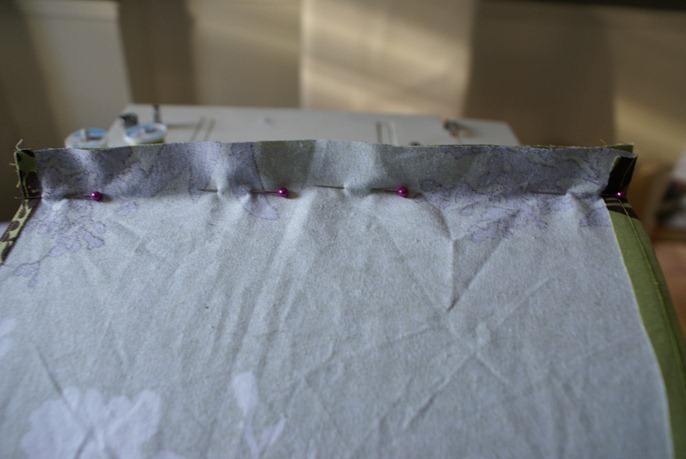
Right side facing in, wrap the fabric around the shade, brining the ends together, then pin down the length of the fabric.

Lampshade slip cover tutorial

Remove the slipcover and sew down the edge that you marked with your pins.

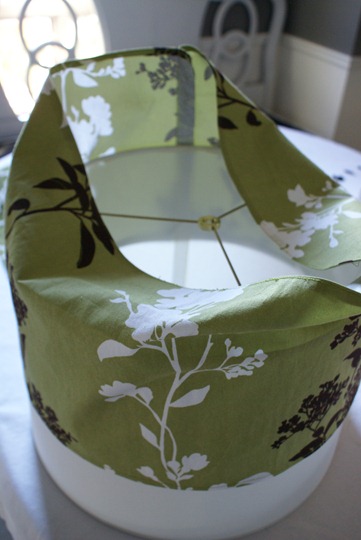
Turn it right side out matching your seam to the seam on the shade,  and slip it over.
Lampshade slip cover tutorial

That’s it. Easy to do and easy to change.
Before

Lampshade slip cover tutorial
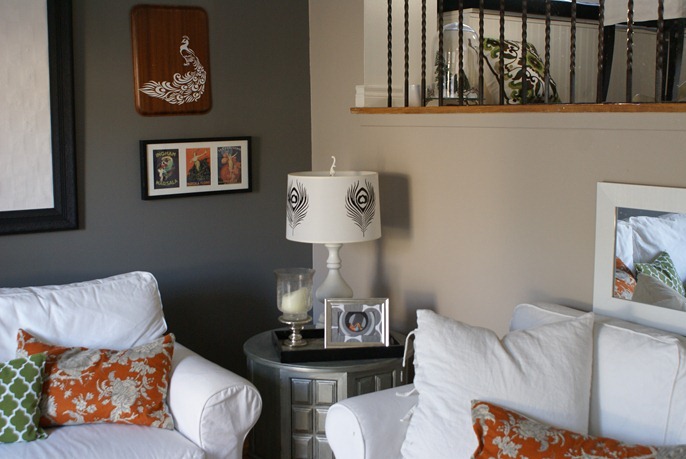
After

Lampshade slip cover tutorial

Saturday SevenUndertheTableandDreaming

Wednesday 21 November 2012

Christmas Craft #4 – laundry supply tub

I guess I crafted this but it’s not really a craft, it’s a Christmas gift for my youngest sister, who is a freak about doing laundry. She hates having any dirty laundry and when I call to ask her what she is doing, more often than not she will say “laundry” LOL

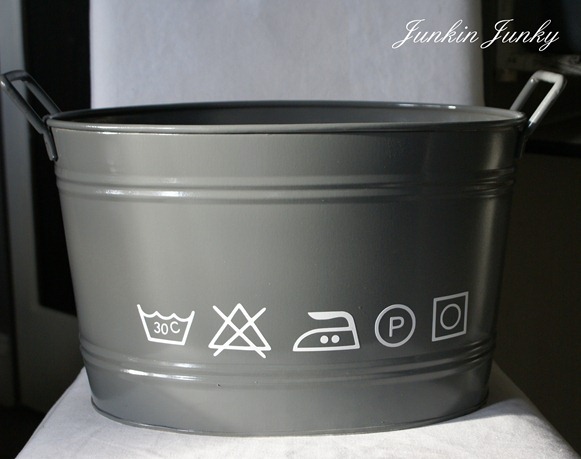
I found the original idea on Pinterest, but the source is no longer available.  Here is what I came up with.  I will fill it with all of her favourite laundry supplies and even if she never uses it, it was fun to put it together.

DSC09559

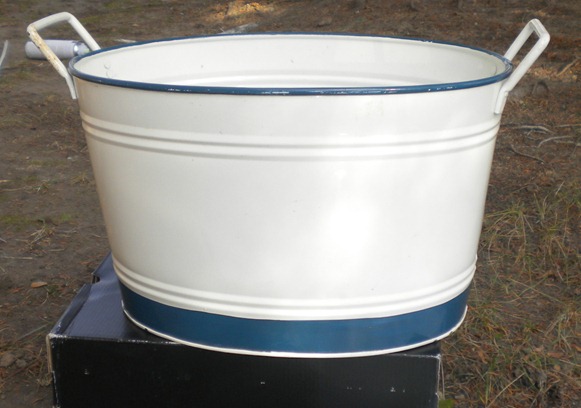
I found the tub at a garage sale this past summer for 50 cents.

DSCN4148

I really like the colour of this spray paint which is Krylon’s  smoke grey.

The laundry images are free clipart and were found online here

Laundry icons, download royalty-free vector clipart (EPS)

I don’t enjoy doing laundry. I wish my sister lived here so she could fulfill all of her laundry wishes, forever :)


Saturday SevenUndertheTableandDreaming

Tuesday 20 November 2012

A solution to getting my boxes up

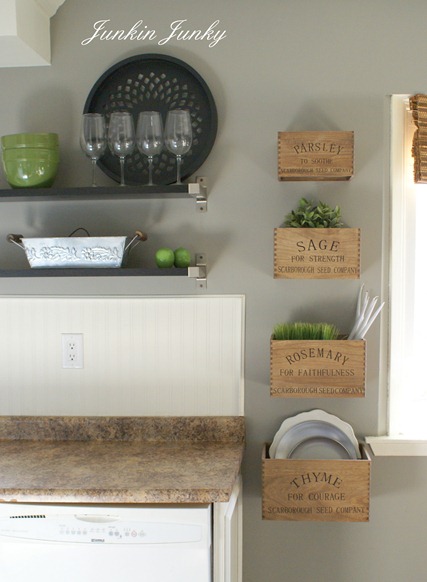
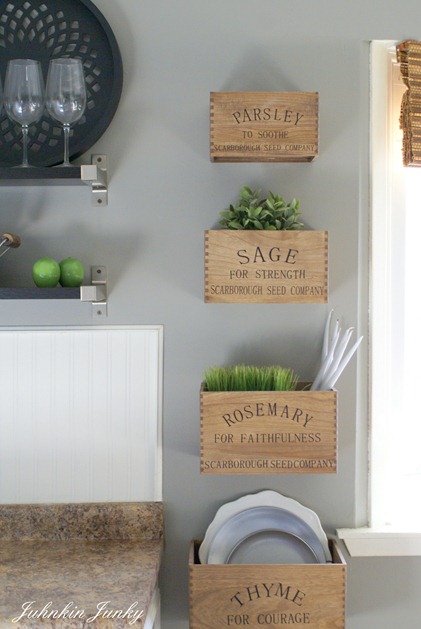
Normally I wouldn’t make an entire post on putting boxes up on the wall, but I was perplexed as to how to get them there.  I got a few opinions on how best to do it, but the one that worked best for me was to use toggle bolts.  It worked!!!

It involved math or something like that; measuring at least to get them centered and level and where to drill the hole in the box and where to drill the hole in the wall and get it all to mesh together.  I am a total dork when it comes to measuring.

rustic herb crates at www.junkinjunky.blogspot.com

Now that it’s daylight, you can see a better likeness of the Minwax special walnut stain. I will definitely use it again.

rustic herb crates at www.junkinjunky.blogspot.com
Love them.

UndertheTableandDreaming